
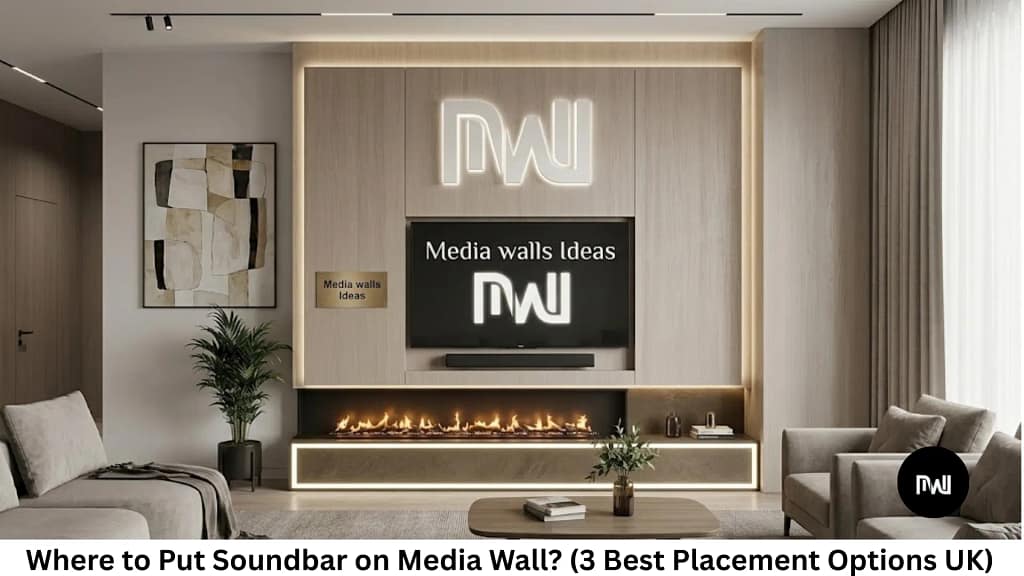
 I’ve mounted over eight soundbars in media walls across Manchester and Leeds. My first Dolby Atmos installation? An absolute disaster.
I recessed a £600 Sonos Arc completely flush into the wall timber. Visually, it looked incredible. Audio-wise, it sounded like a £40 supermarket soundbar. The upward-firing Atmos speakers were firing straight into the timber recess ceiling just 30mm above them. Zero ceiling bounce. Zero height effects.
It cost me £180 for a Sanus extendable bracket and two days of ripping out the plasterboard shelf to reinstall it properly. That single mistake taught me everything you need to know about getting the right soundbar placement media wall UK homeowners actually need.
Why Soundbar Placement in Media Walls is Different
Your media wall isn’t a flat-pack TV stand. You are building permanent stud-wall infrastructure around expensive, high-end electronics.
If you get the media wall soundbar placement options wrong during the framing stage, you are either going to rebuild timber sections later or live with muffled audio for years. I’ve seen both outcomes in client homes across Yorkshire.
Three major factors complicate where to put the soundbar on media wall builds:
- Electric Fireplace Heat: Radiant heat rising directly from below.
- Recessed TVs: Creating depth and line-of-sight challenges.
- Dolby Atmos Acoustics: Upward and side-firing drivers needing exact clearance angles. Standard wall-mount advice simply doesn’t cover these UK-specific build challenges.
Before driving a single screw into timber, make sure you properly plan your media wall project to map out spatial gaps and stud frame dimensions.
Standard Soundbars vs Dolby Atmos Critical Difference
This single distinction determines how you handle your recessed soundbar niche media wall UK layout.
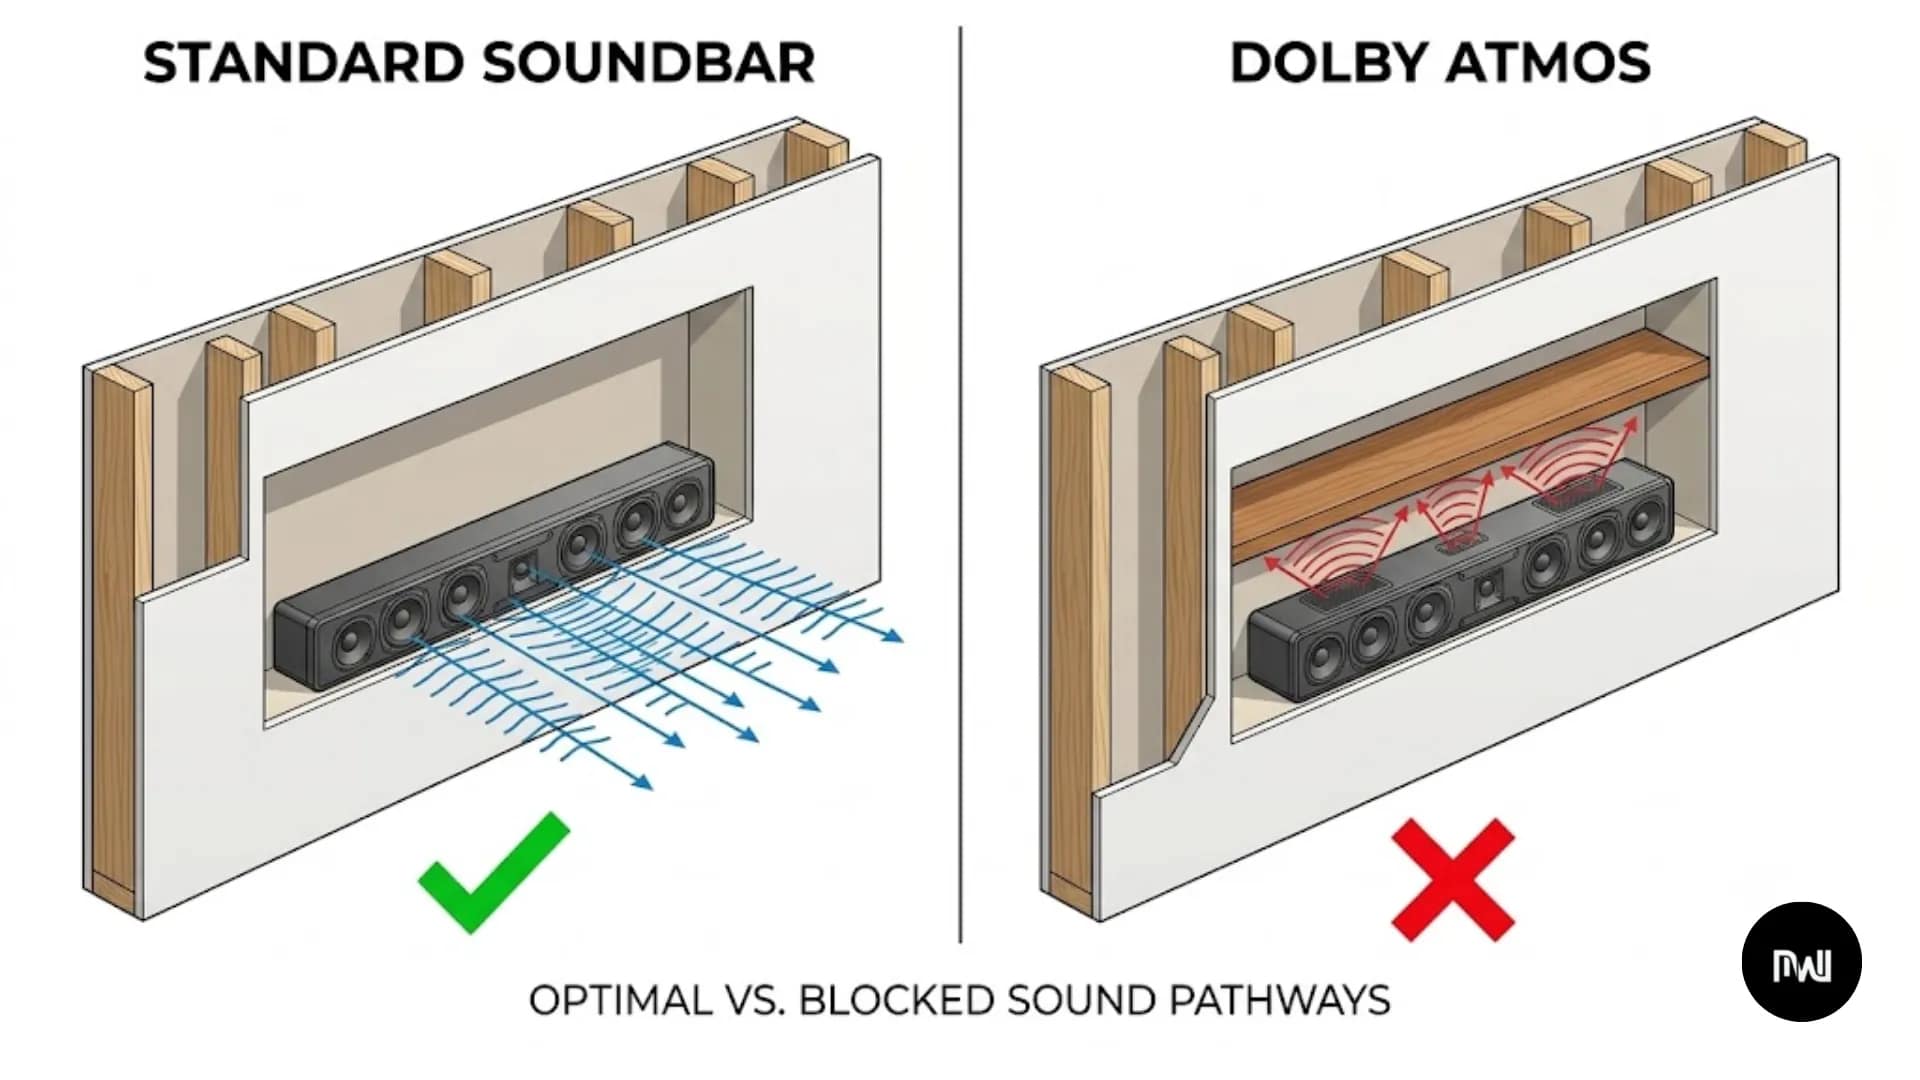
- Standard Soundbars (2.0, 2.1, 3.1 configurations): Forward-firing speakers only. These can be fully recessed flush to your media wall plasterboard without any audio loss. No ceiling clearance is needed. Models like the Samsung HW-B650, Sony HT-SF150, or most soundbars under £200 fall into this category.
- Dolby Atmos Soundbars (X.X.2, X.X.4 configurations): Upward-firing (and often side-firing) drivers. These cannot be recessed flush without completely killing the spatial Atmos effect. They require a minimum of 100mm+ overhead clearance. The Sonos Arc, Samsung Q990D, and LG SL8YG are classic examples.
I tested this the hard way with my own Sonos Arc. Recessing it with only 25mm top clearance caused the upfiring drivers to bounce audio off the internal shelf instead of the room ceiling. The Atmos height channels were basically muted.
Dolby’s official placement guidance confirms that upward-firing drivers need completely unobstructed ceiling access. AVForums users report this exact issue across dozens of UK builds. One Manchester installer told me, “Every second media wall customer tries to recess an Atmos bar flush before understanding the basic physics.”
The Pull-Out Bracket Solution (For Recessed Atmos Soundbars)
This simple fix saved my Sonos Arc setup, and I’ve implemented it on five client builds since.
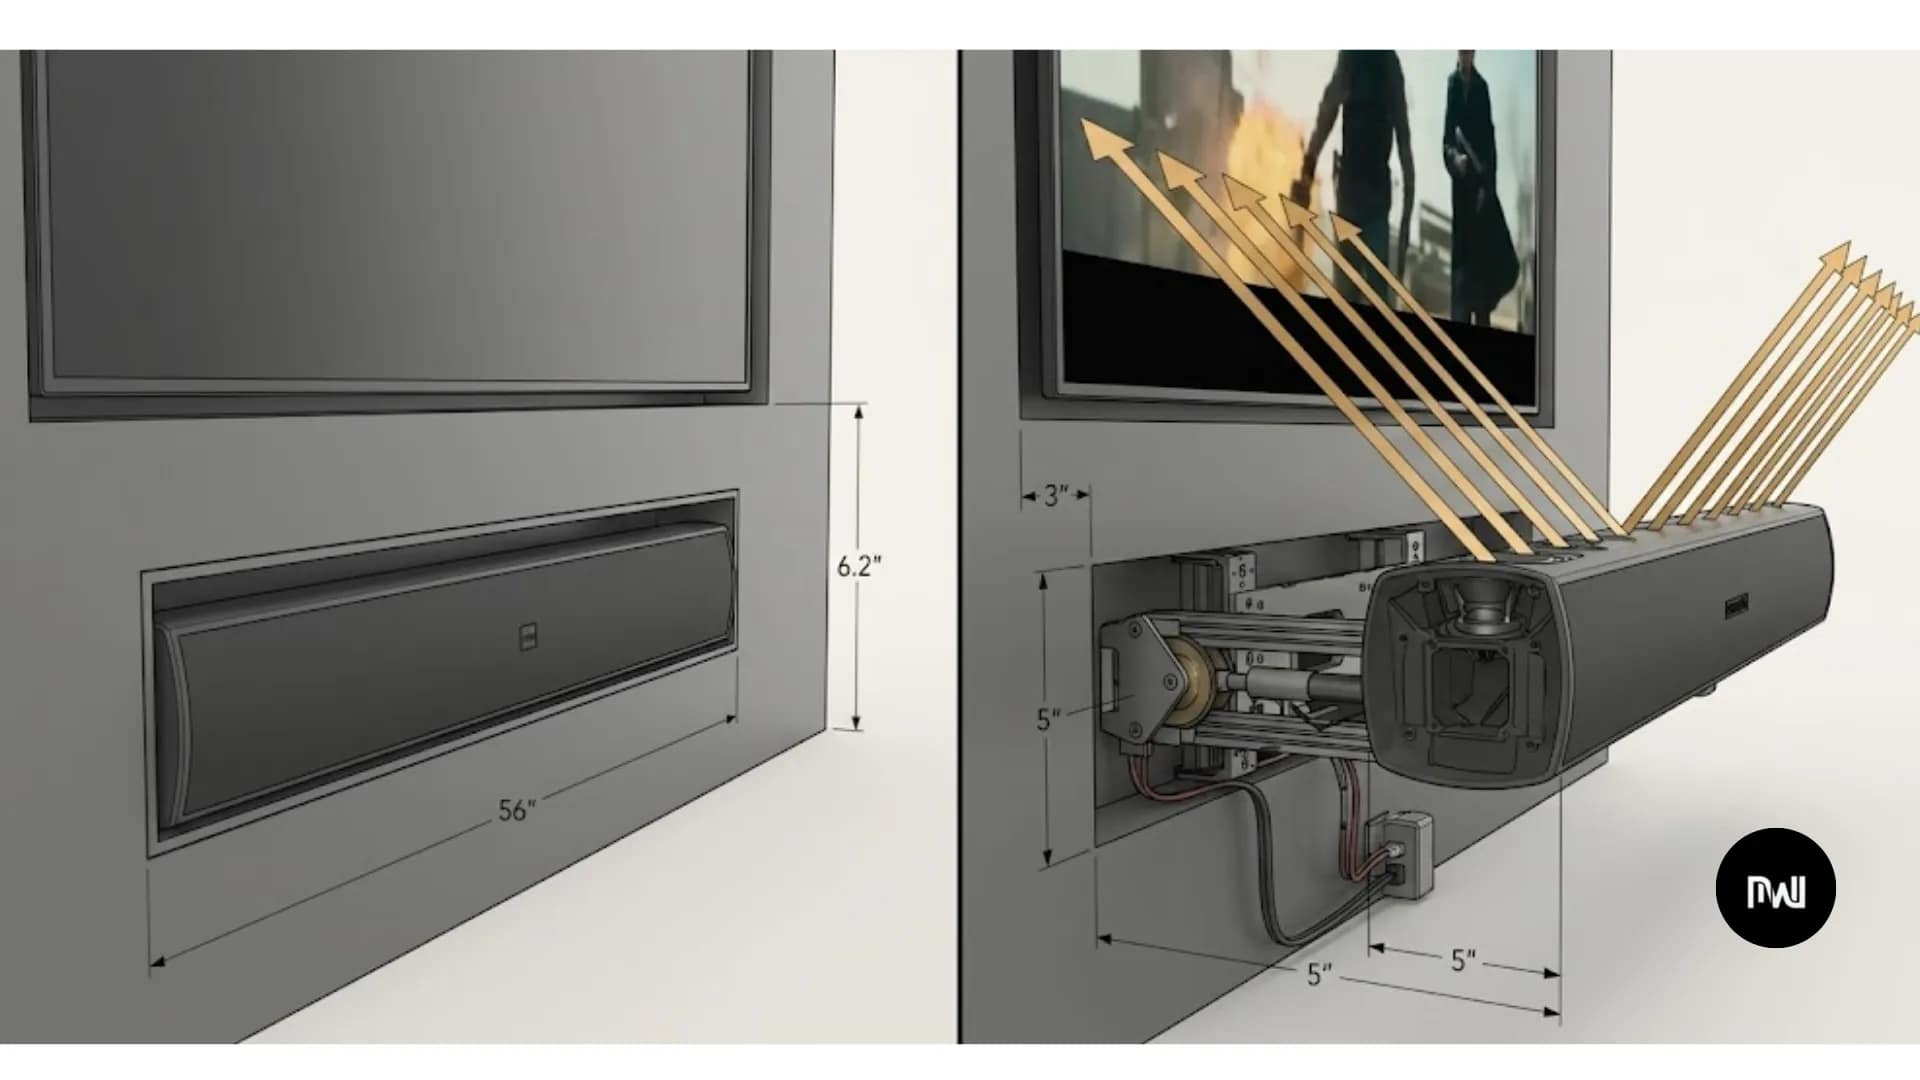
The Sanus Extendable Wall Mount for Arc allows you to pull the soundbar 127mm (5 inches) forward when watching films, and tucks it back flush to the wall when turned off. This gives the upfiring speakers clear, unobstructed ceiling access.
I bought mine from Richer Sounds in Sheffield for £79. Installed in 20 minutes, the Arc sits flush when the TV is off (wife-approved) and extends forward for proper Atmos audio during movie nights.
Smart Home Sounds also stocks them, occasionally offering a 10% bundle discount when bought alongside Sonos speakers. The bracket handles up to 4.5kg and covers both the original Arc and the newer Arc Ultra.
Alternative Option: Sliding shelf hardware from Screwfix. Heavy-duty 15kg-rated drawer slides mounted beneath a shallow MDF shelf allow you to pull the soundbar out manually. It works, though it’s less elegant than the Sanus bracket. Cost: £35 versus £79.
If your setup features an electric fireplace, this pull-out technique is essential. Sitting directly between heat below and a TV above, you simply cannot recess an Atmos soundbar flush while maintaining top-tier audio performance.
Below TV Placement: The 3 Best Options UK
Mounting directly below your TV works for about 80% of all UK media wall installations. Audio originates from the same visual plane as the picture, letting your brain link speech and action naturally.
When figuring out how to position a soundbar on media wall builds, these are my non-negotiable measurement rules:
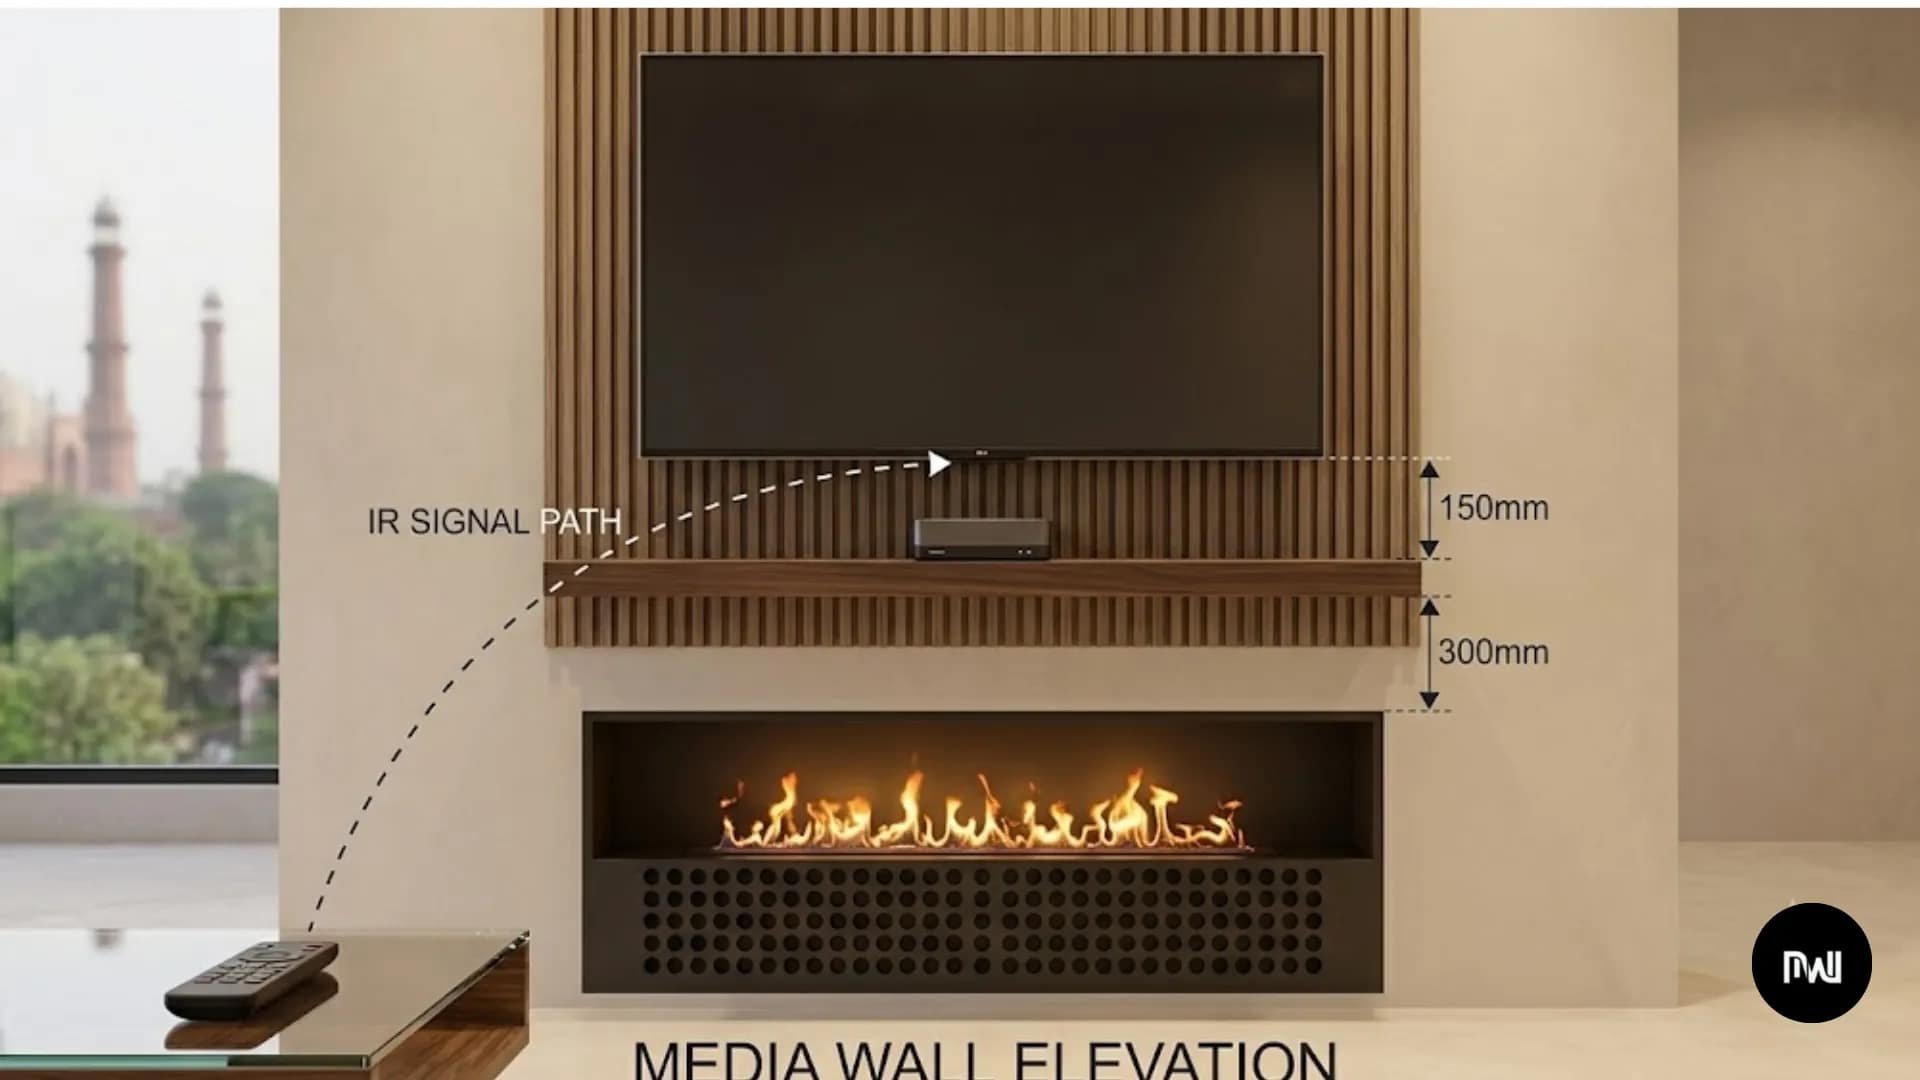
Rule 1: The 100mm–150mm TV Gap
Maintain a 100mm–150mm air gap between the bottom of the TV and the top of the soundbar. This prevents bass vibrations between the two appliances. I learned this after a Samsung Q800D caused a subtle buzzing against a 65″ LG C2 during heavy action scenes.
Equally important, this gap keeps your TV’s Infrared (IR) remote receiver unobstructed. Most TVs position their IR sensor bottom-center. Mounting a soundbar too high will block line-of-sight. I’ve had to lower three soundbars in Leeds homes for this exact reason. Pair this with the best TV mounts for UK media walls to ensure flush alignment with your soundbar.
Rule 2: Extended Shelf Projection for Atmos
If you are placing an Atmos bar on a shelf below a recessed TV, extend the shelf lip 50mm–75mm forward from the face of the wall. This grants the upward drivers clear line-of-sight to the ceiling, even if the TV above sits deep in its own recess. On a Harrogate build, I used 200mm deep shelving—the soundbar sits slightly proud, the TV sits back, and both perform flawlessly.
Rule 3: Managing the Fireplace Heat Stack
If you are placing your soundbar above an electric fireplace, it sits squeezed between two warmth sources. Check your fireplace manual for top clearance rules—usually 200mm–300mm minimum safety margin. Always review the full safety guide on installing a TV and soundbar above a fireplace to prevent heat damage to your electronics.
Best Soundbars for Media Walls UK (2026 Picks)
I’ve personally tested these models inside media wall recesses across UK homes:
- Best Overall for Dolby Atmos (£700–£900): Sonos Arc (£899) – My personal pick. The Sanus pull-out mount was engineered specifically for this 1141mm wide model. Features 11 drivers, true height channels, and automatic EQ tuning. Ideal under 55″–65″ TVs.
- Best Complete Surround System (£1,000–£1,500): Samsung HW-Q990D (£1,299) – True 11.1.4 channels with wireless rear speakers and a standalone sub. I fitted one in a Bolton media wall with a lower fireplace; heat wasn’t an issue since the wireless sub sits elsewhere in the room. Width: 1232mm (best for 65″–75″ TVs).
- Best for Budget Recesses (£150–£250): Sony HT-SF150 (£149) – Non-Atmos, meaning it can be fully recessed flush. Features 2.0 channels and S-Force surround simulation. At 900mm wide, it fits comfortably under 43″–55″ screens. If you’re building on a tight budget, check our guide on low-cost budget media wall ideas .
- Best Mid-Range Atmos (£350–£500): Samsung HW-Q600D (£399) – Compact 3.1.2 channel Atmos bar. Fits shallow alcoves as long as you leave 75mm top clearance. Width: 980mm.

Shelf Mounting vs Wall Bracket Mounting
Both mounting approaches have distinct advantages depending on your media wall structure:
Option A: Custom MDF Shelf Mounting
Best for heavier, multi-channel soundbars (e.g., Samsung Q990D, LG S95TR). A dedicated shelf supports heavy weight and conceals rear cable pass-throughs. Ensure your shelf depth is at least 200mm–250mm. You can explore the best materials for media walls to choose between MDF, MR-MDF, or plywood framing.
I typically construct 25mm MDF shelves painted to match the media wall finish, supported by concealed steel brackets anchored directly into vertical timber studs (never just plasterboard rawlplugs). A 4kg–10kg soundbar mounted solely to plasterboard will eventually pull free.
A deep shelf (300mm+) also creates space behind the soundbar to tuck away a Sky Q mini box, Apple TV, or streaming stick out of sight—a popular setup for smart media wall configurations .
Option B: Direct Wall Bracket Mounting
Creates a clean, “floating” minimalist look for standalone soundbars like the Sonos Arc, Beam, or Samsung Q600D.
Most premium bars include basic mounting plates. However, when securing brackets to a media wall, fix directly into the internal timber stud framework behind the plasterboard face using M8 lag bolts. Plasterboard alone will sag over time.

Media Wall Soundbar Cable Management UK & Regulations
Managing wires inside a hollow stud wall requires careful planning before plasterboarding:
- HDMI eARC vs Optical: Always run high-speed HDMI eARC cables. Standard ARC lacks the bandwidth required for uncompressed Dolby Atmos formats. Optical (TOSLINK) maxes out at 5.1 surround and won’t carry Atmos metadata.
- Avoid Bluetooth for TV Audio: Bluetooth streaming introduces lip-sync latency on TV dialogue. Use wired HDMI eARC for all primary media wall audio connections.
- Cable Routing & Access: Never permanently seal cables inside a wall cavity without a route for replacement. For step-by-step wiring diagrams, refer to our complete media wall cable & wiring guide . Run power and HDMI cables through 20mm oval conduit (available at Screwfix for ~£12) or install a 100mm rear cable access panel inside the soundbar recess.
- UK Electrical Regulations (Part P): If you are installing new electrical spur outlets or hidden double sockets inside the media wall cavity to power your soundbar and TV, ensure the work complies with UK Part P Building Regulations by hiring a qualified electrician early in the build.
Real Build Problems Solved on UK Media Walls
- The Muffled Sonos Arc (Bolton): A client recessed an Arc flush without an air gap. Height channels disappeared. Solved by installing a Sanus extendable bracket (£79 + labor). Atmos restored instantly.
- Blocked TV Remote (Leeds): A Samsung Q800D mounted 80mm beneath a low-slung LG OLED blocked the TV’s central IR sensor. Lowering the soundbar bracket by 40mm restored full remote control line-of-sight.
- Overheating Fireplace Stack (Harrogate): A builder left just 120mm clearance above an active electric fireplace. The soundbar reached 42°C after 30 minutes of heating. Rebuilding the shelf 100mm higher dropped working temperatures to a safe 28°C max.
- Inaccessible Cables (York): A soundbar was built into a sealed plasterboard pocket without rear access. When the HDMI cable failed, replacing it required hours of cutting into finished plasterwork. Always drill 100mm rear ventilation/access holes behind recesses.

The Fireplace-Soundbar-TV Stack Layout Guide
To keep your TV screen at comfortable eye level (1200mm–1300mm from the floor to screen center) when stacking three components vertically in a room with standard 2.4m UK ceilings:
- Fireplace Baseline: Mount the top edge of the electric fireplace at 600mm–750mm from the floor.
- Heat Safety Margin: Leave a 200mm–300mm gap above the fireplace.
- Soundbar Recess/Shelf: Reserve a 100mm vertical zone for the soundbar.
- TV Separation Gap: Leave a 100mm–150mm gap between the soundbar top and the TV bottom.
- TV Position: Mount the TV above this stack.
You can use our free interactive media wall layout calculator tool to quickly test frame heights and gap clearances for your exact wall dimensions.
If this vertical stack pushes your TV screen too high for comfortable viewing, consider an asymmetrical layout or browse our complete media wall with fireplace guide for alternative positioning.
Frequently Asked Questions
Can I recess a Dolby Atmos soundbar fully flush?
No. Dolby Atmos soundbars feature upward-firing drivers that require at least 100mm+ overhead clearance, or an extendable pull-out bracket (like the Sanus mount for Sonos Arc). Standard 2.0/2.1 non-Atmos soundbars can be recessed fully flush.
How far should a soundbar sit from an electric fireplace?
Maintain a 200mm–300mm safety clearance between the top of the electric fireplace and the bottom of the soundbar. Always check the heat emission specs in your fireplace manual.
Will a soundbar block my TV remote?
Yes, if mounted too close. Leave a 100mm–150mm gap between the top of the soundbar and the bottom of the TV screen to keep the central IR receiver clear.
Do I need a qualified electrician for a media wall soundbar build?
If you are adding new hidden mains sockets or extending ring mains behind the plasterboard, UK Part P regulations require a certified electrician. If you are simply plugging into existing wall sockets, you can DIY.
How much does it cost to build a full media wall setup?
Total costs vary based on fireplace models, joinery, and audio integration. Check out our breakdown on media wall installation costs in the UK to budget effectively.
Where is the best place to put a soundbar?
The best place for a soundbar is directly below your TV, centred with the screen and with nothing blocking its front. On a media wall, recess it into a dedicated shelf or alcove beneath the TV so the sound fires straight into the room. Keep it at roughly ear height when seated for the clearest dialogue.
Where should I put my soundbar with a wall-mounted TV?
Mount it directly beneath the wall-mounted TV, centred on the screen. On a media wall, build a shallow recessed shelf about 10-15cm below the TV’s bottom edge – this keeps the soundbar’s remote sensor and any upward-firing speakers unobstructed while cables stay hidden inside the wall.
How far below the TV should a soundbar be?
Leave 10-15cm of clear space between the bottom of the TV and the top of the soundbar. Any closer and the TV frame can block upward-firing speakers and the remote sensor; much further apart and dialogue starts to feel disconnected from the picture.
Can I mount a soundbar on the wall?
Yes – most soundbars have keyhole slots or threaded inserts for wall mounting. Use the manufacturer’s bracket or a universal soundbar mount fixed into solid timber noggins (not just plasterboard), centred below the TV. On a media wall, a recessed shelf usually gives a cleaner finish than surface mounting.
Checklist Before You Start Framing
- Buy the soundbar FIRST: Never trust online spec sheets alone. Measure your actual soundbar width, depth, and height in person before cutting timber studs.
- Build tolerance into recesses: Add 20mm extra width and depth to any custom alcove dimensions to account for plasterboard thickness, skim coat, and paint.
- Use cardboard mockups: Cut cardboard to your TV, soundbar, and fireplace dimensions and tape them to the bare wall. Live with the layout for two days to verify viewing heights and spacing before driving a single screw into the wall framework.
Your media wall will be in your living room for 10+ years. Getting soundbar placement right matters. Avoid common mistakes detailed in our guide on DIY vs professional media wall costs to ensure your build stays on budget and structurally sound.